記事内に商品プロモーションを含む場合があります
アプリを使わずにブログ記事内に商品をカード挿入するには?
どうも〜!Shopify好きなちさです!
Shopifyのブログって WordPressのClassicEditorのように慣れている人には使いやすい反面、ショートコードが打てなかったりと意外と不便なことがあります…
特にお客さんからの要望の多い商品をブログ記事内で埋め込みしたい要望には、ブログカードなどのアプリを使って実装することが可能です。ですが、月額がかかってしまうので、優先順位的には落ちますよね…
そこで、今回はアプリを使わずに、ブログ記事内に商品カードを挿入する方法をご紹介します。

これでブログ記事で商品を目立たせたりできるね!
目次
ブログ記事内に商品カードを作る方法
2022年8月時点の情報になります
まずは完成形
完成形はこんな感じです。
ブログ記事内に下記を入れると、その下の画像のように表示されます。
<div class="card" data-url="商品のURL">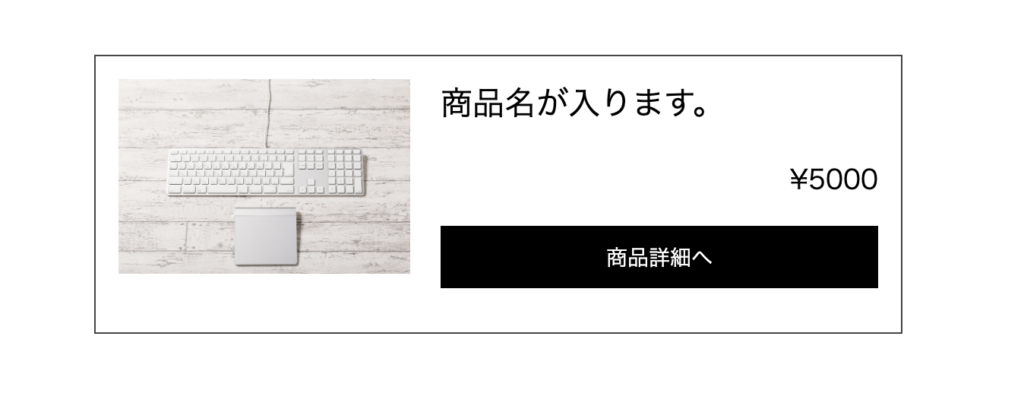
さくっとコードが知りたい人向け
前提条件として、jQueryの読み込みが必要です。
$(function(){
  if($('.card').length == 0){
    return;
  }

  $('.card').each(function(){

    const card = $(this);

    const url = $(this).data('url');
    const data_url = url.replace('サイトのURL',''); //一応、replace
    let html = '';

    $.ajax({
      type: 'GET',
      url: window.Shopify.routes.root + data_url ,
      dataType: 'json'
    }).done(function (json, status, xhr) {

      let target = json.product;
      let description = target.body_html;

      let price = target.variants[0].price;

      html = `<div class="card-body">
      <figure class="card-body__image"><img src="${target.image.src}" alt=""></figure>
      <div class="card-body__content">
      <p class="title"><a href="${url}">${target.title}</a></p>
      <p class="price">¥${price}</p>
      <p class="buy-button">商品詳細へ</p>
      </div>`;
      $(card).append(html);

    }).fail(function (json) {
      // console.error('失敗しました。')
    });


  });
});
/* ブログ 商品掲載
------------------------------------------ */
.card-body{
display: flex;
padding: 20px;
position: relative;
border: 1px solid #444;
margin: 40px 0;
}
.card-body a::before{
content: '';
display: block;
position: absolute;
width: 100%;
height: 100%;
top: 0;
left: 0;
z-index: 1;
}
.card-body__image{
width: 40%;
margin: 0;
}
.card-body__image img{
margin-bottom: 0;
}
.card-body__content{
width: 60%;
margin: 0;
padding-left: 30px;
}
.card-body__content .title{
font-size: 1.5em;
margin-top: 0;
}
.card-body__content .title a{
text-decoration: none;
}
.card-body__content .price{
font-size: 1.25em;
text-align: right;
}
.card-body__content .buy-button{
background: #000;
padding: 10px 0;
text-align: center;
color: #fff;
}
@media screen and (max-width: 768px){
.card-body{
padding: 10px;
}
.card-body__content{
padding-left: 20px;
}
.card-body__content .title{
font-size: 1.25em;
}
}コード解説
AjaxAPIを使って、商品情報を引っ張ってきています。
Shopify


Product API reference
Learn about the calls that the Ajax Product API can make and the responses it will return.
HTML
<div class="card" data-url="商品のURL">data-url に商品のURLを入れます。card クラスをつけたもの全て引っ張ってくるため、他で 同じクラスを使っている場合必要に応じてクラスを変えてください。
JavaScript
Ajaxを使うのを簡単にさくっとしたいため、jQueryを使ってます。(Vanilla版はそのうち記事書きます…)
まず、cardクラスごとに{}内の処理を実行していきます。
$('.card').each(function(){ // card クラスのそれぞれで処理を行う
    const card = $(this);
    const url = $(this).data('url'); // data-url に入れた商品URLを取得
    const data_url = url.replace('サイトのURL',''); //一応、replace
    let html = ''; //HTMLコード生成用

}
次に、Ajax部分です。
Ajax通信で返ってきた値をtargetに入れて、必要な情報を htmlにしてます!
ボタンなどいらないものは取っ払ったり、付け足したりしてください。
$.ajax({
  type: 'GET',
  url: window.Shopify.routes.root + data_url , //product情報を引っ張ってくるためのURL
  dataType: 'json'
}).done(function (json, status, xhr) {

  let target = json.product; // 結果をtargetに入れる

  // 表示する商品情報をそれぞれ変数に入れる
  let description = target.body_html; // 商品説明
  let price = target.variants[0].price; // 金額(バリエーションが1つのみの場合)
  let title = target.title; //商品名
  let image = target.image.src; //商品画像

  html = `<div class="card-body">
  <figure class="card-body__image"><img src="${image}" alt=""></figure>
  <div class="card-body__content">
  <p class="title"><a href="${url}">${title}</a></p>
  <p class="price">¥${price}</p>
  <p class="buy-button">商品詳細へ</p>
  </div>`;
  $(card).append(html);

}).fail(function (json) {
  console.error('取得に失敗しました。')
});
まとめ
Shopifyのブログでアプリを使わずに商品情報を見せることができるようになります。
よかったら参考にしてみてください!